HomeMapsStar Sphere
Game Mode: DominationSpace

Star Sphere Map Guide – Marvel Rivals Domination Strategy

Star Sphere is a zero-gravity orbital station map set in the vastness of deep space, featuring a three-point Domination mode across interconnected celestial platforms. The map rewards vertical mobility, flanking through narrow corridors, and coordinated team pushes across exposed open walkways connecting the capture zones.

Updated May 25, 2026
🔗 View on Wiki

Overview

Star Sphere is one of Marvel Rivals' most visually striking arenas, taking place aboard a massive orbiting space station surrounded by the cosmos. The map is divided into three distinct capture points — left, center, and right — each connected by a network of elevated catwalks, interior corridors, and open observation decks. The station's design creates a natural tension between teams who want to hold the high ground on the outer rings and those pushing through the tight interior passages at mid-level. Glowing energy conduits and holographic star maps serve as both aesthetic details and visual landmarks that experienced players use to call out positions.

The center capture point is the beating heart of Star Sphere, positioned on a large circular platform with minimal cover and sightlines that extend across the entire map. Controlling this point puts enormous pressure on the enemy team, as they are forced to push from predictable angles — the two flanking corridors to the left and right, or through the elevated overpass that arcs above the center platform. Teams that secure the center early can rotate quickly to either side point and snowball their advantage. However, holding center too aggressively without flank awareness is a common mistake, as the side corridors offer rapid rotation paths for enemies.

The left and right capture points mirror each other in general structure but differ in detail. The left point is partially enclosed with overhead cover provided by the station's structural supports, making it more defensible and favored by anchor tanks who can hold a doorway. The right point sits on a more open observation deck, offering sightlines back toward center and rewarding heroes with long-range capabilities. Both side points have elevated positions accessible via jump pads or hero movement abilities — these perches are critical to contest or deny during a match.

Star Sphere's space theme is not purely cosmetic. Several sections of the map feature low-gravity zones near the outer edges, allowing mobile heroes to extend jumps and reach unconventional angles that ground-bound heroes struggle to counter. These anti-gravity corridors often become secondary flanking routes that are overlooked in the heat of battle, and teams that actively use them can catch defenders completely off guard. The ambient lighting — deep blacks pierced by nebula hues of blue and purple — can obscure movement at range, adding a subtle but real gameplay element to long-distance engagements.

⚔️ Attack Tips

When attacking on Star Sphere, resist the instinct to immediately contest all three points at once. The most effective opening strategy is to collapse on the center capture point as a full six-person unit, using the numerical advantage to eliminate defenders before they can establish control. Once center is secured, split your team into a holding group of two or three players while the remainder rotates to the side point that is less defended. The jump pads on both flanks are your fastest rotation tools — learn their destinations early so you are never caught running across open catwalk when the enemy has vision.

Flanking is the key to breaking a dug-in defense on Star Sphere. If the enemy team has established a chokehold on a capture point — especially at the left point's doorway or behind the large observation console on the right — a direct frontal assault is almost always punished. Instead, send one or two high-mobility heroes through the low-gravity outer corridors to attack from the unexpected angle at the rear of the defending cluster. Duelists like Spider-Man or Black Panther are especially effective in this role, as they can traverse the anti-gravity sections quickly and disengage if the pressure fails. Coordinating this flanking push with a simultaneous frontal distraction from your tanks creates the cross-fire that breaks defensive formations.

Ultimate ability timing on Star Sphere should be synchronized with capture point contests, not used reactively in open-space skirmishes. The most impactful ultimates on this map are area-denial tools that cover the capture circle itself — forcing enemies off the point is worth more than raw eliminations in an open corridor. When your team identifies a coordinated ultimate combo, the trigger point should be the moment enemies have clustered on or near a capture zone. The center platform's circular shape and lack of escape routes on one side makes it the single best location to land multi-target ultimates in the entire match.

🛡️ Defense Tips

Defending on Star Sphere demands that your team designate roles before the match begins: a point anchor, a flank watcher, and a pressure duelist. The anchor — ideally a Vanguard like Magneto or Thor — holds the primary approach corridor to your designated capture point, taking up space and absorbing pressure while the rest of the team responds. The flank watcher must continuously patrol the outer low-gravity corridors, because leaving them uncontested is the single biggest mistake defensive teams make on this map. A single enemy flanker who goes unchecked through those passages can wipe a Strategist and collapse your whole structure in seconds.

On the left capture point, position your tank in the doorway threshold rather than standing on the point itself. This denies enemy progress while keeping your Strategist healers safely behind in the more enclosed inner room. Use the overhead structural supports as cover for your ranged heroes — standing on or near those supports gives an elevated angle that enemies pushing through the door below cannot easily return fire on. For the right point's open observation deck, counterintuitively, your best defenders are heroes with long-range poke like Hawkeye or Hela, who can zone enemies from the moment they step onto the connecting catwalk, making the approach extremely costly before the attackers even reach the point.

Do not over-commit to defending a lost point. Star Sphere's Domination scoring means that surrendering one side capture point while collapsing your full six players onto the center creates an immediate trade that typically favors the rotating defending team. Identify when a point is lost, call the retreat through voice or quick communication, and reform on center as a coherent unit. Teams that bleed players trying to hold an untenable side point consistently lose the score race because they never fully contest any zone. Reset, regroup on center, then use the center capture as a springboard to reclaim a side point with numbers advantage.


🦸 Best Heroes

🦸
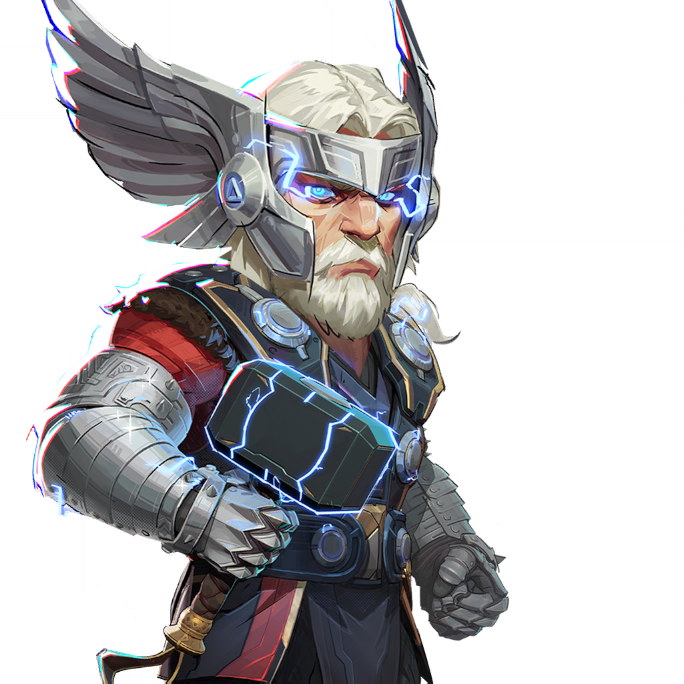
ThorVanguard
Thor's ability to launch aerial hammer throws across the open catwalks and his Awakening Mjolnir ultimate are devastating on the circular center capture point. His mobility lets him rotate between the three zones quickly, and his bulk makes him an ideal chokepoint anchor at the left point doorway.
🦸
MagnetoVanguard
Magneto's Metal Bulwark shield is perfectly suited to blocking the narrow approach corridors on Star Sphere, and his ability to pull enemies off capture points with Metallic Curtain can swing a close-contested domination tick. His ranged metallic projectiles reward the elevated platform sightlines on the right side point.
🦸
Spider-Man's web-swinging traversal makes him the fastest hero to exploit Star Sphere's anti-gravity outer corridors and elevated perches. He can dive a Strategist, eliminate them, and escape before the enemy team can react, making him the premier flanker on this map.
🦸
HelaDuelist
Hela's Nightsword Tempest ultimate and long-range spike projectiles are tailor-made for the open sightlines of Star Sphere's right capture point and the center catwalks. She can safely zone enemies from elevated positions and punish overextension across the open connecting bridges.
🦸
Star Sphere's open walkways and exposed capture points create ideal conditions for Hawkeye's precise long-range arrows. He dominates the right observation deck sightlines and can consistently punish enemies attempting to cross the center catwalk without cover.
🦸
Cloak & Dagger's ability to swap between damage and healing modes makes them exceptionally flexible on a three-point Domination map. Their Darkforce Dimension ultimate can deny an entire capture zone for its duration, and their mobility in Cloak form lets them reposition safely between the station's corridors.
🦸
Luna SnowStrategist
Luna Snow's Fate of Both Worlds ultimate can instantly shift the momentum of a contested center point by healing your entire team simultaneously while damaging enemies within range. Her area healing sustains anchoring tanks through the prolonged fights that naturally develop around Star Sphere's capture circles.

🦸
Black Panther's Vibranium Marks and high burst damage make him lethal in the close-quarters corridors connecting Star Sphere's zones. His Bast's Descent ultimate is one of the few abilities that can single-handedly clear a clustered group off a capture point, and his mobility through the map's vertical sections is unmatched among melee duelists.

📍 Key Locations

Center Orbital Platform
The primary capture point of Star Sphere and the most contested location in every match. A large circular platform with minimal hard cover and sightlines extending to both side points. Controlling this zone enables fast rotations in either direction and puts constant scoring pressure on the enemy. The circular shape makes it ideal for area-denial ultimates and extremely punishing for teams without coordination.
Left Point Doorway Chokepoint
A narrow structural doorway that serves as the only direct ground-level approach to the left capture point. A single well-placed Vanguard or large hitbox hero can bottle up this passage significantly, forcing attackers to either fight through or reroute. This is one of the most impactful single defensive positions on the entire map.


Right Observation Deck
The right capture point sits on an open observation deck with expansive sightlines back toward center and the connecting catwalk. The lack of cover makes it dangerous to hold passively, but the elevation advantage rewards heroes with ranged poke abilities. The deck's outer edge drops into a low-gravity corridor that flankers use to approach from below.
Outer Low-Gravity Corridors
The anti-gravity passages running along the outer hull of the station connect all three capture zones through secondary paths that many players ignore. These corridors enable extended jumps and unconventional vertical angles. They are the primary flanking superhighway of Star Sphere and must be actively watched by the defending team or risk allowing enemies to attack from completely unseen positions.
Center Overpass Bridge
An elevated catwalk that arcs above the center capture point, providing a firing position that looks down onto both the center circle and the connecting walkways. Heroes who claim this bridge control the vertical high ground of the entire map's middle section. However, the bridge has limited cover of its own and becomes a dangerous position if the team below is eliminated and you are left isolated.
Side Rotation Catwalks
The connecting walkways between the center platform and each side capture point are exposed transit corridors with minimal cover. Crossing them under enemy pressure — particularly from the overpass bridge or the right deck's long sightlines — is extremely hazardous. Teams that establish crossfire on these catwalks can effectively cut off enemy rotation and isolate individual capture zones.
Energy Conduit Pillars
Large glowing energy pillars near the center platform provide the only significant hard cover in the central area of Star Sphere. Experienced players use these as brief cover during pushes and as positional anchors during team fights on the center point. Supports positioning behind these pillars can heal through the fight while remaining difficult to reach for diving duelists.
Jump Pad Stations
Positioned at key transition points near each side capture zone, the jump pads allow rapid vertical access to elevated platforms and dramatically speed up hero rotation between zones. Mastering jump pad destinations is essential for fast-responding defenders and for attackers looking to reach elevated positions ahead of the enemy. Controlling space near the jump pads is nearly as valuable as controlling the capture circles themselves.
🛠 Team Builder for this Map
Build your team and see how it performs
+
+
+
+
+
+
Adam WarlockA
Adam Warlock
AngelaA
Angela
Black CatA
Black Cat
Black PantherA
Black Panther
Black WidowB
Black Widow
BladeA
Blade
Captain AmericaA
Captain America
Cloak & DaggerA
Cloak & Dagger
DaredevilA
Daredevil
DeadpoolA
Deadpool
Devil DinosaurA
Devil Dinosaur
Doctor StrangeA
Doctor Strange
Elsa BloodstoneB
Elsa Bloodstone
Emma FrostS
Emma Frost
GambitB
Gambit
GrootA
Groot
HawkeyeA
Hawkeye
HelaS
Hela
HulkB
Hulk
Human TorchA
Human Torch
Invisible WomanA
Invisible Woman
Iron FistB
Iron Fist
Iron ManS
Iron Man
Jeff the Land SharkA
Jeff the Land Shark
LokiS
Loki
Luna SnowS
Luna Snow
MagikS
Magik
MagnetoS
Magneto
MantisA
Mantis
Mister FantasticA
Mister Fantastic
Moon KnightA
Moon Knight
NamorB
Namor
Peni ParkerA
Peni Parker
PhoenixS
Phoenix
PsylockeS
Psylocke
Rocket RaccoonS
Rocket Raccoon
RogueB
Rogue
Scarlet WitchS
Scarlet Witch
Spider-ManS
Spider-Man
Squirrel GirlB
Squirrel Girl
Star-LordA
Star-Lord
StormA
Storm
The PunisherA
The Punisher
The ThingB
The Thing
ThorA
Thor
UltronA
Ultron
VenomS
Venom
White FoxA
White Fox
Winter SoldierA
Winter Soldier
WolverineA
Wolverine
★ = Recommended for Star Sphere
← Back to Maps